How to Set Up a Reef Tank
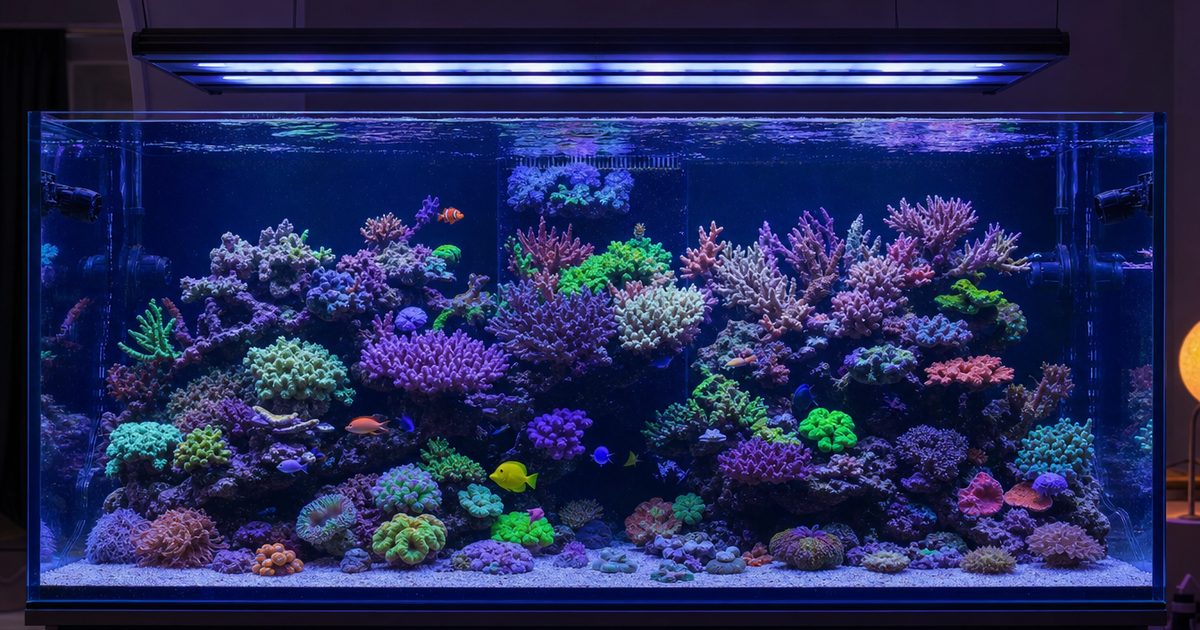
The biggest decision in a reef build is not which coral to buy — it is whether you give the tank the stability it needs before you stock it. Get the flow and the rest of the parameters right and the coral takes care of itself; rush them and you watch your first corals melt. This guide walks a beginner through setting up a reef tank that does not crash, in the order the decisions actually matter: why stability beats stocking, the slow cycle, what a protein skimmer does and how to size one, turnover by coral type, PAR by reef group, the stability stack, the full reef cart in buying order, and the rookie mistakes to skip.
A quick word on how I write here. I'm Daniel, the founder of Coral & Flow. I run a mixed reef — softies, LPS and a few SPS — out of San Diego, and I've kept it stable for eight years and counting: an in-sump protein skimmer, a couple of powerheads and a gyre for flow, an LED fixture, a titanium heater on a controller, an ATO and a dosing pump. My first saltwater tank, though, was a disaster. I came over from freshwater excited and impatient, rushed the cycle, bought an undersized skimmer because it was cheaper, ran far too little flow, and spent the early weeks chasing numbers and adding livestock too fast. Within a few weeks the corals melted and I nearly quit. I only came back because a guy at my reef club walked me through doing it slowly. Everything below is the version of that conversation I wish I'd had before I bought anything. The opinions come from years on my own glass; the product figures come from manufacturer specs and established reef rules, not from any lab test I'm pretending to have run. I keep those two things separate, always.
Why stability beats stocking
Walk into any reef forum and the beginner questions are almost all about livestock — which coral is easy, which fish gets along, what to add first. They're the wrong first questions. A reef lives or dies on whether the water stays steady: temperature, salinity, alkalinity, calcium and magnesium holding their range day after day. Coral and the symbiotic algae inside it are slow, sensitive organisms; they tolerate a value that's slightly off far better than a value that swings. A tank that sits at 8.5 dKH all week is healthier than one that bounces between 7 and 10, even though both "average" the same.
That's why the gear comes first. Every piece of reef equipment exists to do one job: hold the water steady so livestock can thrive. The reef tank filtration exports waste before it can spike nutrients. The flow and circulation carries food and oxygen to coral and waste away from it. The reef lighting drives the photosynthesis that feeds the coral. And the stability gear — heater, ATO, dosing, test kits — holds temperature, salinity and chemistry inside their bands. Beginners who chase perfect numbers and add livestock too fast crash tanks. Beginners who slow down, size the gear up, and let the parameters settle do not. Stability gear, not livestock, makes the reef.
The slow cycle, and why rushing it crashes tanks
The single most common way a first reef dies is a rushed cycle. Cycling is how the tank grows the bacteria that process waste: ammonia (toxic) is converted to nitrite (still toxic) and then to nitrate (far less toxic and exported by water changes and the skimmer). Until that bacterial population is established, anything you add produces ammonia the tank can't handle — and your new livestock pays for it.
A proper cycle commonly takes several weeks. You add an ammonia source, then test until ammonia and nitrite both read zero and you see a measurable nitrate — that's the tank telling you the bacteria are doing their job. There is no trick that safely compresses this. Bottled bacteria can help seed the process, but the tank still needs time to stabilise. I rushed mine because I was impatient, and I learned the expensive way that the cycle is not the part to hurry. The patience you spend here pays back for the whole life of the tank.
What a protein skimmer does, and how to size one
If one piece of gear defines reef filtration, it's the protein skimmer — which is exactly why I list filtration as skimmer-first. A skimmer pulls dissolved organic waste out of the water before it breaks down into nitrate and phosphate. Inside the skimmer body, fine air bubbles give organics a surface to cling to; the foam rises into a collection cup and carries the gunk out of the system entirely. Nothing else exports waste as effectively, and on a closed reef, export is everything.
Sizing is where beginners go wrong, and where I went wrong. A skimmer is rated for a tank-volume band, but that rating assumes a moderate fish load. Your real bioload — how heavily you stock and how much you feed — is what actually matters. A heavily stocked tank wants a skimmer rated well above its water volume; a lightly stocked tank can run nearer its rating. Sizing up is the safe error. I bought an undersized skimmer because it was cheaper, and an undersized skimmer is one of the most common reasons a first reef struggles to find its feet. Spec-by-spec, the figures that decide a skimmer are its rated tank-volume band, its pump and air-draw rating, and whether it fits your plumbing — an in-sump skimmer for a tank with a sump, a hang-on-back for an all-in-one or sump-less tank, a nano skimmer for a small footprint. The reef tank filtration hub walks in-sump versus HOB versus nano, filter socks, media reactors and return pumps in depth.
Turnover by coral type: why flow is non-negotiable
Flow is the spec beginners under-buy most, and dead spots crash more first reefs than bad luck does. In a reef, water movement does three jobs: it brings food and oxygen to coral, it carries waste away from coral tissue, and it keeps detritus suspended so it can be exported instead of rotting in a corner. Flow is measured as turnover — how many times your total tank volume circulates per hour.
How much you need depends on what you keep. As a working guide, soft corals and many LPS are happy around 10–20× turnover, while SPS want 30–50× or more. The goal is random, turbulent motion across the whole tank, not a single laminar jet that blasts one spot and leaves dead zones everywhere else. For an SPS-dominant tank, higher turbulent turnover makes sense because dense SPS branches need strong flow to feed and to shed waste; for a softie tank, that much flow would just batter the corals. You build this with powerheads, wavemakers (controllable powerheads that can pulse and vary their output) and gyre pumps that push a broad sheet of water, placed so streams cross or bounce off the glass to create turbulence. The aquarium powerhead and circulation hub covers powerheads versus wavemakers versus gyres, return-pump flow and placement.
PAR by coral group: matching the light to the reef
Lighting is where reef-keepers either match the light to their coral or guess and pay for it in bleaching or algae. The spec that matters is PAR — photosynthetically active radiation, the light corals can actually use for photosynthesis, measured at the coral rather than at the water surface. Watts tell you little: two fixtures of the same wattage can deliver very different PAR depending on optics, spectrum and mounting height.
As a working guide, soft corals and many LPS do well at lower PAR (roughly 50–150), while SPS want noticeably more (roughly 150–300+ at the coral). The honest rule is to match the fixture to your hardest-to-please coral group and acclimate corals up to higher light slowly — a sudden jump in intensity bleaches coral, and a long, intense photoperiod on a young tank with no coral demand just feeds algae. That over-lighting trap is a classic beginner mistake: start with a shorter, lower-intensity photoperiod and ramp up as corals go in. Beyond PAR, the specs that decide a light are spectrum, spread and coverage for your tank footprint — a spread-style fixture for longer tanks, a point-source puck for cubes and nanos. The reef aquarium lights hub breaks down PAR and spectrum by coral type, coverage and mounting height, and fixture versus puck.
The stability stack: heater, ATO, dosing, test kit
Once filtration, flow and light are sorted, the stability stack is what holds the whole thing steady between water changes. These four are the gear that keeps livestock alive while you sleep.
- Heater (and controller). Temperature swings stress coral, so a reliable heater is non-negotiable. A common rule of thumb is roughly 3–5 watts per gallon, often split across two heaters for redundancy, adjusted for room temperature. A titanium heater on a separate controller is the reef-standard setup because it fails safe and holds temperature tightly. A stuck heater is one of the few failures that can cook a tank overnight, which is why the controller matters.
- ATO (auto top-off). As water evaporates, salt stays behind and salinity creeps up — so a tank that isn't topped off slowly drifts saltier. An ATO replaces evaporated water with fresh RODI automatically, which keeps salinity stable. It's one of the highest-value, lowest-glamour upgrades on a reef; the ATO that quietly topped my tank off while I was away for a week is the reason I came home to a stable reef instead of a salt-creep problem.
- Dosing. Growing corals consume calcium, alkalinity and magnesium. Early on, regular water changes may replace what they use; as the coral load grows, a dosing pump adds those elements steadily so the parameters don't sag between changes. Dosing is about holding the chemistry level, not about chasing a perfect number.
- Test kits. You can't hold parameters you don't measure. A basic reef test kit — alkalinity, calcium, magnesium, plus ammonia/nitrite/nitrate during cycling — is how you know whether the stack is working. Test consistently, with the same kit, and watch the trend rather than panicking over a single reading.
Widely used reef targets are roughly: temperature 76–78°F, salinity 1.025 SG, alkalinity 8–9 dKH, calcium 420–440 ppm, magnesium 1300–1400 ppm. The exact figures matter less than keeping them steady. The reef tank parameters hub covers heaters, ATO, dosing, test kits and salt, and owns the Tools.
The full reef cart, in buying order
A tank is the first purchase, not the only one. Buy in this order and you won't over-spend on the wrong thing first — this is the natural reef cart-stack, where each piece sets up the next.
- The tank (and sump). Pick the display and, if you can, a sump — it adds water volume (which buys stability) and gives the skimmer and other gear a home out of sight.
- The protein skimmer. The heart of filtration; size it to your real bioload, not just the tank label. See the best protein skimmer guide.
- Return pump and powerheads/wavemaker. Move water between display and sump, and build the turnover your corals need. See the best wavemaker for a reef tank.
- The reef light. Matched on PAR and spectrum to your coral group. See the best reef lights.
- The heater (and controller). Holds temperature steady and fails safe. See the best reef tank heater.
- ATO and doser. Hold salinity and chemistry between water changes.
- Test kit, salt and media. Measure what you're holding, mix your water, and polish with carbon or GFO if needed.
- Livestock — last. Add slowly, a little at a time, only once parameters hold steady on their own.
Work out the sizing for each stage before you buy with the Reef Matcher — enter your tank volume and coral type and it returns your turnover, skimmer rating band, return-pump GPH, PAR target, heater wattage and ATO sizing, plus a welfare-conscious stocking ceiling. For salt mix and dosing volumes, the salinity & dosing calculator does the math.
The rookie mistakes to skip
Almost all first-reef regret comes from the same short list. I made most of these myself; avoid them and you're ahead of where I was for that first frustrating month.
- Rushing the cycle. The number-one tank killer. Wait until ammonia and nitrite read zero and nitrate is measurable before anything goes in. There's no safe shortcut.
- Chasing numbers instead of letting the tank settle. Constantly dosing and tweaking to hit a perfect figure causes the swings you're trying to avoid. Hold parameters steady and leave the tank alone to find its feet.
- Adding livestock too fast. Each addition is a load on the system. Stock slowly, a little at a time, and let the tank absorb each step.
- Buying an undersized skimmer because it was cheaper. The exact mistake that hobbled my first tank. Size up to your bioload, not down to your budget.
- Running too little flow. Under-buying turnover leaves dead spots where detritus rots and corals recede. Match flow to your highest-demand coral and aim for random turbulence everywhere.
A note on livestock and parameters
Everything here about coral and fish is general, parameter-based reef-keeping information — target ranges, turnover rules and PAR figures drawn from established reef references and manufacturer specs. It is not a prescription for your specific tank or livestock, and it is not veterinary or disease-treatment advice. Always test your own water, follow each product's instructions, and acclimate livestock slowly. The reason this site separates voice from data so carefully is the same reason your reef will thrive: get the equipment and the parameters right, be patient, and let the tank do the rest.
Frequently asked questions
What is the most important thing when setting up a reef tank?
Stability. A reef lives or dies on holding temperature, salinity and the key parameters steady — not on what you stock. Rushing the cycle, undersizing the protein skimmer and running too little flow crash more first reefs than bad luck does. Get the equipment and the parameters right and the reef takes care of itself. These are general reef-keeping guidelines, not veterinary advice.
How long does it take to cycle a reef tank?
A proper cycle commonly takes several weeks, and rushing it is one of the most common reasons a first tank crashes. The tank needs time to build the bacteria that convert ammonia to nitrite to nitrate before any livestock goes in. Test for ammonia and nitrite to read zero and a measurable nitrate before you add anything. Patience here pays off for the life of the tank.
What does a protein skimmer actually do, and do I need one?
A protein skimmer pulls dissolved organic waste out of saltwater before it breaks down into nitrate and phosphate, using fine air bubbles that carry organics into a collection cup. On a reef it is the single most effective mechanical-export device, which is why filtration here is skimmer-first. Most reef builds run one, sized to the real bioload rather than just the tank label.
How much flow does a reef tank need?
Flow is measured as turnover — how many times the tank volume circulates per hour. As a rough guide, soft corals and many LPS are happy around 10–20× turnover, while SPS want 30–50× or more, delivered as random turbulent motion rather than one blasting jet. Match total flow to your highest-demand coral group. These are general reef-keeping guidelines, not a prescription for your specific tank.
How much light (PAR) does a reef tank need?
It depends on the coral. Soft corals and many LPS thrive at lower PAR (roughly 50–150), while SPS want noticeably more (roughly 150–300+ measured at the coral). PAR — photosynthetically active radiation — is the figure that matters, not watts. Match the light to your hardest-to-please coral group and acclimate corals up to higher light slowly.
What order should I buy reef gear in?
A natural buying order is: tank → protein skimmer → return pump and powerheads/wavemaker → reef light → heater → ATO and doser → test kit → salt and media. Stocking comes last. The Reef Matcher helps you size the skimmer, flow, light and heater to your tank before you buy.
What are the target reef parameters?
Widely used reef targets are roughly: temperature 76–78°F, salinity 1.025 SG, alkalinity 8–9 dKH, calcium 420–440 ppm, magnesium 1300–1400 ppm. The exact figures matter less than keeping them steady over time. The Reef Matcher and the salinity & dosing calculator help you work toward these targets. This is general reef-keeping information — test your own water and follow product labels.
How much should I spend before adding livestock?
Spend on the stability stack first — skimmer, flow, light, heater, ATO and test kits — because that equipment is what keeps livestock alive. The biggest beginner mistake is buying coral and fish before the system is stable. Stock last, slowly, and only once parameters hold steady on their own.
Where to go next
The four silos, each starting from a buyer-first hub, plus the Tools that size your gear for you.
Keeping freshwater too, or coming to saltwater from a planted tank like I did? The same patience and stability mindset carries over — our freshwater counterpart, Planted Tank Hub for aquascaping and planted freshwater builds, is the sister site for the other side of the hobby. Coral & Flow stays strictly saltwater reef.